openCV对图像形状、颜色、方向的识别
openCV对图像形状、颜色、方向的识别
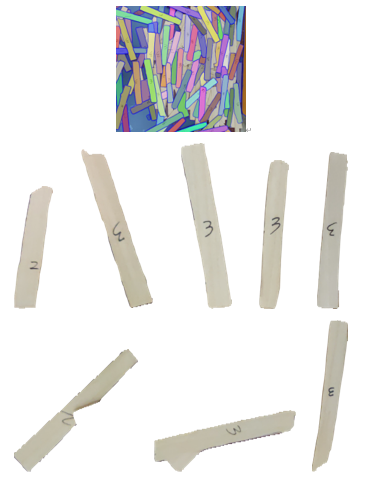
首先是对图片进行处理,未知(懒得知道)原因需要黑色背景,亮色物体。
# 设置并解析参数
ap = argparse.ArgumentParser()
ap.add_argument("-i", "--image", default='E:/SO/color/colorE.png', help="path to the input image")
args = vars(ap.parse_args())
# 读取图片
image = cv2.imread(args["image"])
# 进行裁剪操作
resized = imutils.resize(image, width=300)
ratio = image.shape[0] / float(resized.shape[0])
# 进行高斯模糊操作
blurred = cv2.GaussianBlur(resized, (5, 5), 0)
# 进行图片灰度化
gray = cv2.cvtColor(blurred, cv2.COLOR_BGR2GRAY)
# 进行颜色空间的变换
lab = cv2.cvtColor(blurred, cv2.COLOR_BGR2LAB)
# 进行阈值分割
thresh = cv2.threshold(gray, 60, 255, cv2.THRESH_BINARY)[1]
# cv2.imwrite("E:/SO/color/colorthresh.png",thresh)
# 在二值图片中寻找轮廓
cnts = cv2.findContours(thresh.copy(), cv2.RETR_EXTERNAL, cv2.CHAIN_APPROX_SIMPLE)
cnts = imutils.grab_contours(cnts)
对图片处理好了,我们现在需要识别图形颜色和形状。颜色是自己设置几个颜色库,然后对物体像素颜色和颜色库里的颜色比对,获取最像的那一个。我这里只设置了杨木颜色和红色(松木,但事实上松木也不是那么红色)。而形状的识别是根据轮廓角点的个数,三个即三角形,四个即四边形,五个即多边形,否则就是圆形等等。
# coding=utf-8
# 导入一些python包
from scipy.spatial import distance as dist
from collections import OrderedDict
import numpy as np
import cv2
# 创建一个颜色标签类
class ColorLabeler:
    def __init__(self):
        # 初始化一个颜色词典
        colors = OrderedDict({
            "red": (255, 0, 0),
            "Yang": (191,176,145)})
        # 为LAB图像分配空间
        self.lab = np.zeros((len(colors), 1, 3), dtype="uint8")
        self.colorNames = []
        # 循环 遍历颜色词典
        for (i, (name, rgb)) in enumerate(colors.items()):
            # 进行参数更新
            self.lab[i] = rgb
            self.colorNames.append(name)
        # 进行颜色空间的变换
        self.lab = cv2.cvtColor(self.lab, cv2.COLOR_RGB2LAB)
    def label(self, image, c):
        # 根据轮廓构造一个mask,然后计算mask区域的平均值
        mask = np.zeros(image.shape[:2], dtype="uint8")
        cv2.drawContours(mask, [c], -1, 255, -1)
        mask = cv2.erode(mask, None, iterations=2)
        mean = cv2.mean(image, mask=mask)[:3]
        # 初始化最小距离
        minDist = (np.inf, None)
        # 遍历已知的LAB颜色值
        for (i, row) in enumerate(self.lab):
            # 计算当前l*a*b*颜色值与图像平均值之间的距离
            d = dist.euclidean(row[0], mean)
            # 如果当前的距离小于最小的距离,则进行变量更新
            if d < minDist[0]:
                minDist = (d, i)
        # 返回最小距离对应的颜色值
        return self.colorNames[minDist[1]]
# coding=utf-8
import cv2
# 创建形状检测类
class ShapeDetector:
    def __init__(self):
        pass
    def detect(self, c):
        # 初始化形状名和近似的轮廓
        shape = "unidentified"
        peri = cv2.arcLength(c, True)
        approx = cv2.approxPolyDP(c, 0.04 * peri, True)
        # 如果当前的轮廓含有3个顶点,则其为三角形
        if len(approx) == 3:
            shape = "triangle"
        # 如果当前的轮廓含有4个顶点,则其可能是矩形或者正方形
        elif len(approx) == 4:
            # 获取轮廓的边界框并计算长和宽的比例
            (x, y, w, h) = cv2.boundingRect(approx)
            ar = w / float(h)
            shape = "square" if ar >= 0.95 and ar <= 1.05 else "rectangle"
        # 如果这个轮廓含有5个顶点,则它是一个多边形
        elif len(approx) == 5:
            shape = "pentagon"
        # 否则的话,我们认为它是一个圆
        else:
            shape = "circle"
        # 返回形状的名称
        return shape
那么这个时候已经解决了形状和颜色(树种)的识别。
# 初始化形状检测器和颜色标签
sd = ShapeDetector()
cl = ColorLabeler()
接下来就是找到每个轮廓的中心,计算定向角度。并将这些信息,绘制在图中。
# 遍历每一个轮廓
total = 0
for c in cnts:
    # 计算每一个轮廓的中心点
    M = cv2.moments(c)
    cX = float((M["m10"] / M["m00"]))
    cY = float((M["m01"] / M["m00"]))
    # 计算定向角度
    x = float((M['m20'] / M['m00']) - (cX * cX))
    y = float((M['m11'] / M['m00']) - (cX * cY))
    z = float((M['m02'] / M['m00']) - (cY * cY))
    x1 = 2 * y
    x2 = x - z
    x3 = x1/x2
    theta = fastAtan2(x1 , x2)/2
    theta = float('%.2f' % theta)
    # theta = math.atan(x3)/2
    # theta = theta/math.pi*180
    #获取重心
    locations = (int(cX* ratio),int(cY* ratio))
    #获取面积
    area = float(M["m00"])
    # print(locations, theta)
    total += 1
    # 进行颜色检测和形状检测
    shape = sd.detect(c)
    color = cl.label(lab, c)
    # 进行坐标变换
    c = c.astype("float")
    c *= ratio
    c = c.astype("int")
    # text ="{} {} {} {} {}".format(locations, color, shape, area, theta)
    #待绘制信息及绘制位置
    text1 ="the baohua {}, Directional angle is {}.".format(total,str(int(theta)))
    location1 =  (int(cX* ratio-80),int(cY* ratio))
    text2 = "the location is {},it's {}".format(locations,color)
    location2 = (int(cX* ratio-80),int(cY* ratio + 50))
    text3 = "The size is {}, the shape is {}".format(area,shape)
    location3 = (int(cX* ratio-80),int(cY* ratio + 100))
    # 绘制轮廓并显示结果
    cv2.drawContours(image, [c], -1, (0, 255, 0), 2)
    cv2.putText(image, text1, location1, cv2.FONT_HERSHEY_SIMPLEX, 0.5, (225, 255, 255), 2)
    cv2.putText(image, text2, location2, cv2.FONT_HERSHEY_SIMPLEX, 0.5, (225, 255, 255), 2)
    cv2.putText(image, text3, location3, cv2.FONT_HERSHEY_SIMPLEX, 0.5, (225, 255, 255), 2)
    cv2.imwrite("E:/SO/color/colorshapeRES_colorE.png", image)
    print("[INFO] found {} baohua".format(total))
形状方向的原理:https://blog.csdn.net/dieju8330/article/details/83345249
问题
获取重心的时候有一个*ratio不知道啥意思,就是说如果在重心cX = float((M["m10"] / M["m00"]))后面不*ratio,那得到的重心就不对。但是呢,如果*ratio了,那后面计算的定向角度就不对。
2023/4/24更新
利用YOLOv5进行图像的刨花分割
对分割后的单片刨花进行角度测量